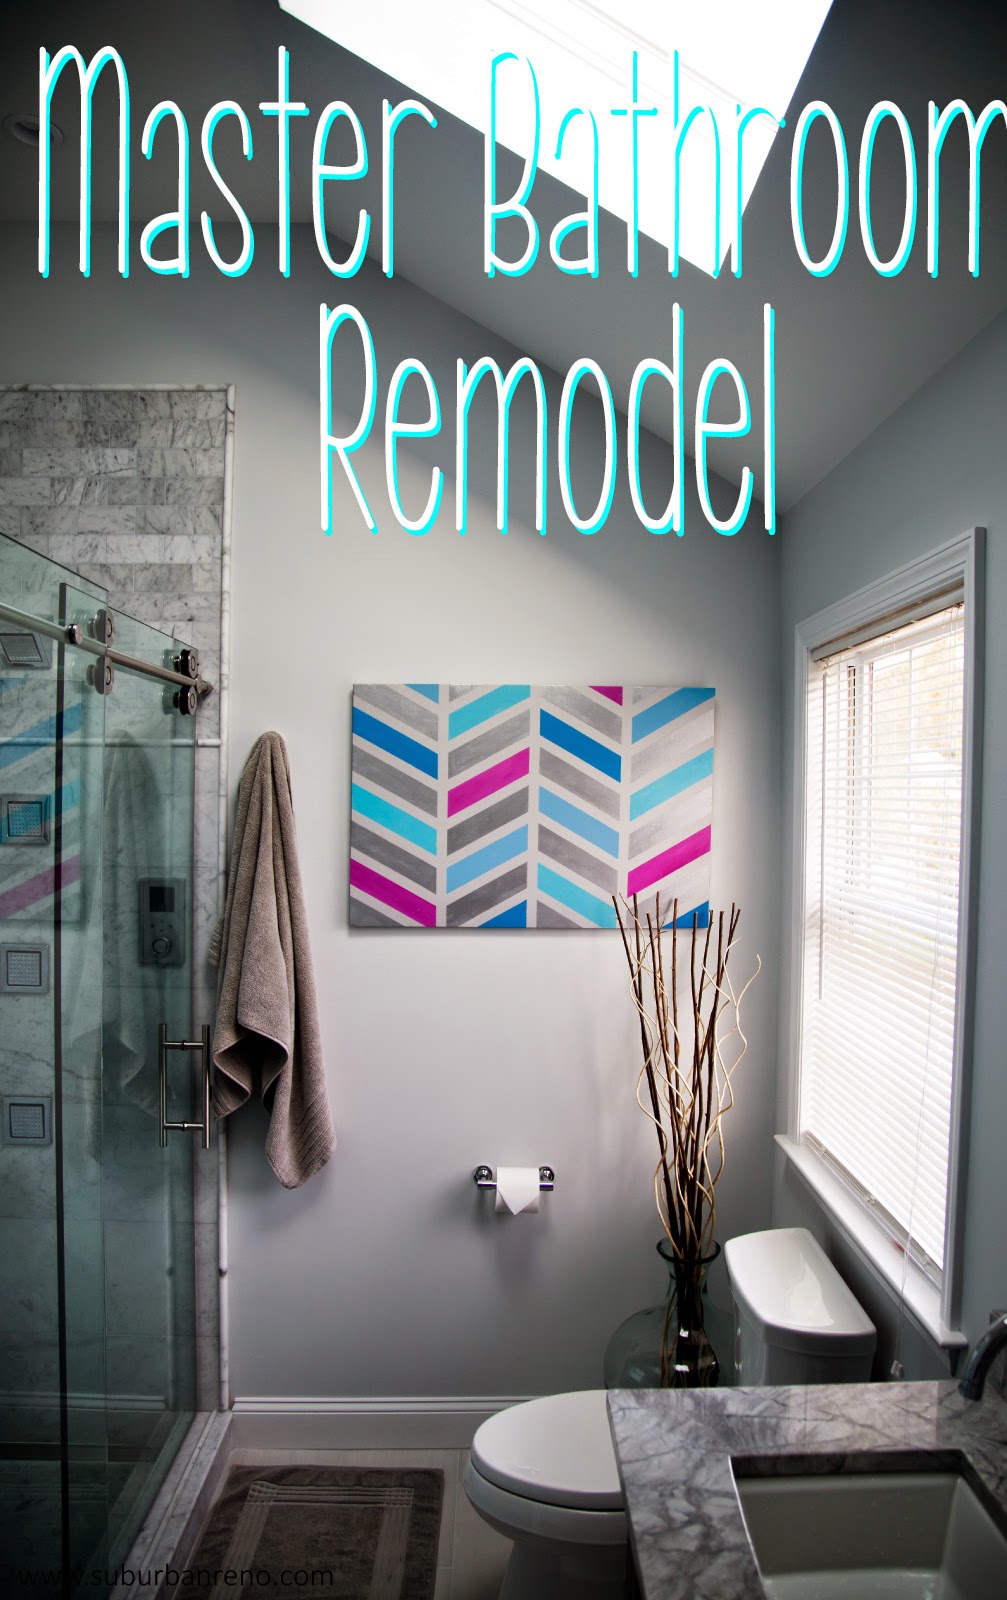
Hi Everyone! After months of hard work, I am finally ready to reveal the master bathroom! You may have already seen a preview of the bathroom on my DIY Herringbone Art post, but I wanted a proper post to go through each detail of the bathroom remodel! So, without further ado, here is the Master Bathroom reveal!!
So to recap, this is what our bathroom looked like when we first moved in (see Part 1 here).

And this is what it looked like last November (2013), after Eric and my Dad finished gutting the room down to the studs and subfloor and framing out a new ceiling.

We fully changed the floor plan to include a double vanity and a double shower. In order to do this, we needed to hire a plumber to move all of the pipes. This is our floor plan before and after:
Before After

I hope you like my drawings here!
To give the bathroom some extra room, we decided to trade out the hinged door for a sliding pocket door. Once the plumber moved all of the plumbing and “sistered” the beams in the subfloor, he built a half-wall to act as the end of the double shower.

With the new floor plan in progress, we had to start picking out our fixtures. We knew we wanted a neutral color scheme, so we started with picking out our shower tile and counter tops. Our first stop was at the local stone yard to look through some stone slabs. We saw everything from granite to quartz to marble.


We settled on this slab of Quartzite in Superior White. We made the decision to go with Quartzite rather than granite or marble because it is a more durable natural stone and we loved the color.

Once we had our counter top nailed down, we took a small sample of it to the tile store with us. Thus, started our three month design nightmare. I never knew how frustrating remodeling a home could be until Eric and I had to decide on the details of this bathroom. We apologize to our wonderful tile consultant, Dee, for all of our indecision and grumpiness!!

These are the forty different floor tiles that they had in our color scheme

Here are some shower tiles, also in our color scheme

Tip: Most tile retailers will allow you to bring tile samples home, which is a great way to see how the color and textures of your choices will look in your own home
Bringing samples home caused another month of delays due to indecision (sorry again Dee!)
While we went with Quartzite for the counter top, we decided to put Carrara Marble tile in the shower. We used small subway tiles for the floor and mixed medium subway tiles with large rectangular slabs on the walls. We also decided to add two built-in niche’s for storage and the infamous infinity drain (which Eric insisted we needed).

Eric was adamant that our shower needed to be “AWESOME”. He is nothing if not thorough, and through his research, we decided to go with the Kohler DTV System (affiliate link here). This included 1 rain head, 1 hand shower, 1 shower head, 3 body sprays and a digital remote. Needless to say, we had a lot of people ask to use this shower during Thanksigiving!


Here is a breakdown of some of the other items that we used in our bathroom:
Double Vanity: Purchased at Home Depot (get it here)
Square Sinks: Purchased at Home Depot (get them here)
Faucets: Purchased through Simon’s Hardware (get them here)
Mirrors: Purchased from Pottery Barn (get them here)
Light Fixture: Purchased from Lumens (get it here)

That’s everything! We have a few more minor details that we are still working on, but the majority of this Master Bathroom Remodel is done!! I hope you enjoyed this post! Come back soon!!


No Comments