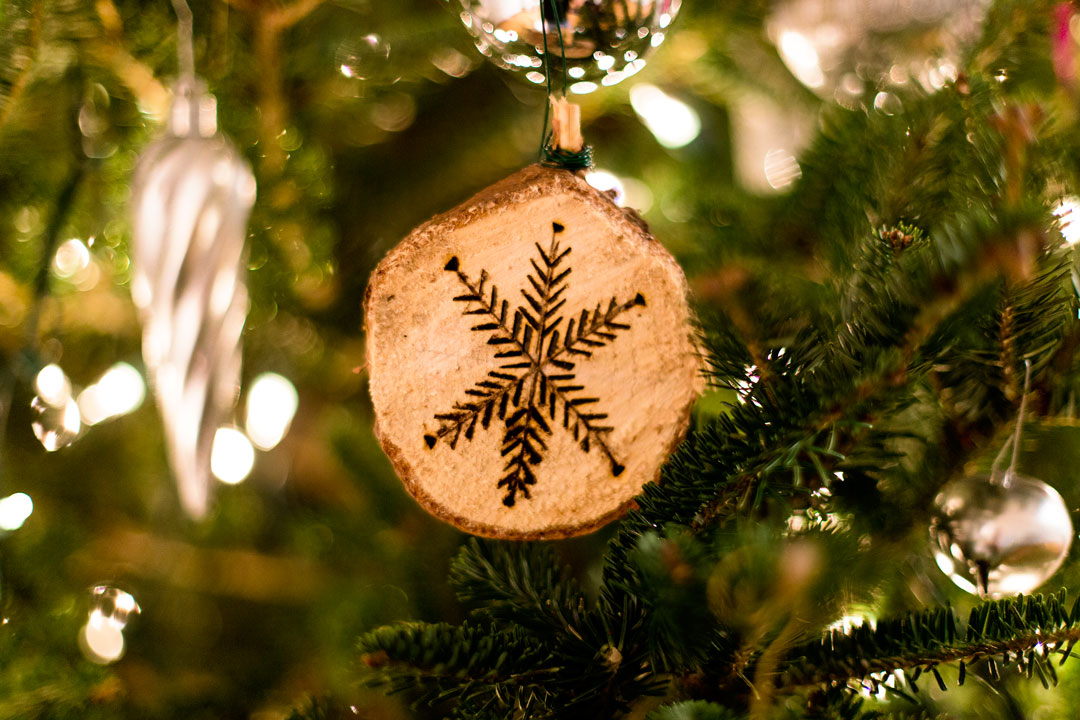
Since the first Christmas after we got married and moved into our house, Eric and I have been saving these wooden discs which were cut from the bottoms of our Christmas trees. We wanted to do something with them, but we weren’t sure what. My mother-in-law suggested that we make these into ornaments! We did some research on Pinterest and came up with the idea to use a wood burning tool to draw snowflakes on one side and then have the date on the other side. The date (2013, 2014, 2015) represents the year that we cut the disc from the bottom of that years Christmas tree trunk.
During Thanksgiving, when the family was in town, we finally set up to get this project done. My mother-in-law lent me her wood burning pen and we drew some snowflakes with a pencil so that we had a guide. I will admit, my mother-in-law did most of the wood burning because I was too scared that I would mess something up. I shouldn’t have been scared though, because these came out so great!
Check out the details below!
For this project, you will need:
– Wood Burning Tool (Michaels)
– Wooden Disc
– Pencil/Design

The first thing we did was sketch out the snowflake designs on the discs. We didn’t get too fancy with the designs, instead just keeping it simple. Although, if you are looking to get fancy, there are stencils that you can purchase to elevate your ornament design.

The key to wood burning is to go slow enough that you get the line that you want on the first try. To get these straight lines, press down on the wood burning tool and very slowly trace your line.

Next, press the side of the wood burning pen down to create small straight lines that act at the detail of the snowflake. Don’t get scared if your wood starts to smoke a bit, that is normal and just means that your line is going to come out great!

That’s really all there is to it! There are tons of different designs that you can choose from…just get your creative on!

Check out this post is you want to see some other ornaments that I made last year and go here if you want to see the gorgeous white felt tree skirt that I made for almost nothing!
Thank you so much for stopping by! I hope you enjoyed this post!
Merry Christmas!


8 Comments
Rosa @ LePetitMonkey
December 22, 2015 at 4:26 pmSuch a clever and simple way to make a unique ornament! Very versatile too. I guess one can make lots of designs on the wood piece as well. Can’t wait for my daughter to be old enough to do this together. Perhaps next year! Thank you, Kristen!
Kristen
December 30, 2015 at 12:32 pmThank you Rosa! Yes, there are plenty of designs to choose from and tons of forms that you can use to trace all different kinds of letters, fonts and designs! I can’t wait to see what your daughter comes up with!
xoxo, Kristen
Rita
December 23, 2015 at 4:37 pmSuch a great and unique idea! Love it. It looks so beautiful. 🙂
Rita – http://www.styleroundtheclock.com
Kristen
December 30, 2015 at 12:33 pmThank you so much Rita! It’s very cool to see a unique idea like this come to fruition…especially when it means so much to us personally! Thank you for stopping by!
xoxo, Kristen
janna doan
December 27, 2015 at 10:50 pmkristen, you are so crafty! i love the ornaments! hope you had a wonderful holiday. xoxo,
janna | http://www.jannadoan.com
Kristen
December 30, 2015 at 12:34 pmJanna – I try my best to be crafty, but other members of my family are much better than me! I had a great holiday, I hope you did too! Enjoy your New Years!
xoxo, Kristen
Shell
December 28, 2015 at 11:19 amThis is so cute! I love making ornaments!
Thank you for sharing!
xo, Shell
http://acourageousbeauty.com/
Kristen
December 30, 2015 at 12:34 pmThank you so much for stopping by Shell! These ornaments were so fun to make and they go great with the other ornaments that I made last year!
xoxo, Kristen